
Reaching an isolated fishing village by boat can mean entering a narrow inlet where the depth changes with the tide, currents can push a boat across the entrance, and there may be little room to turn around or find another anchorage. Before I enter, I make three checks: I work out the available depth and the tide's timing, assess how the current moves through the entrance, and decide where the boat can be safely anchored if conditions change. These checks take only a few minutes, but they can make the difference between a straightforward arrival and a difficult one.
Make a Tide Plan Before Entering a Remote Inlet
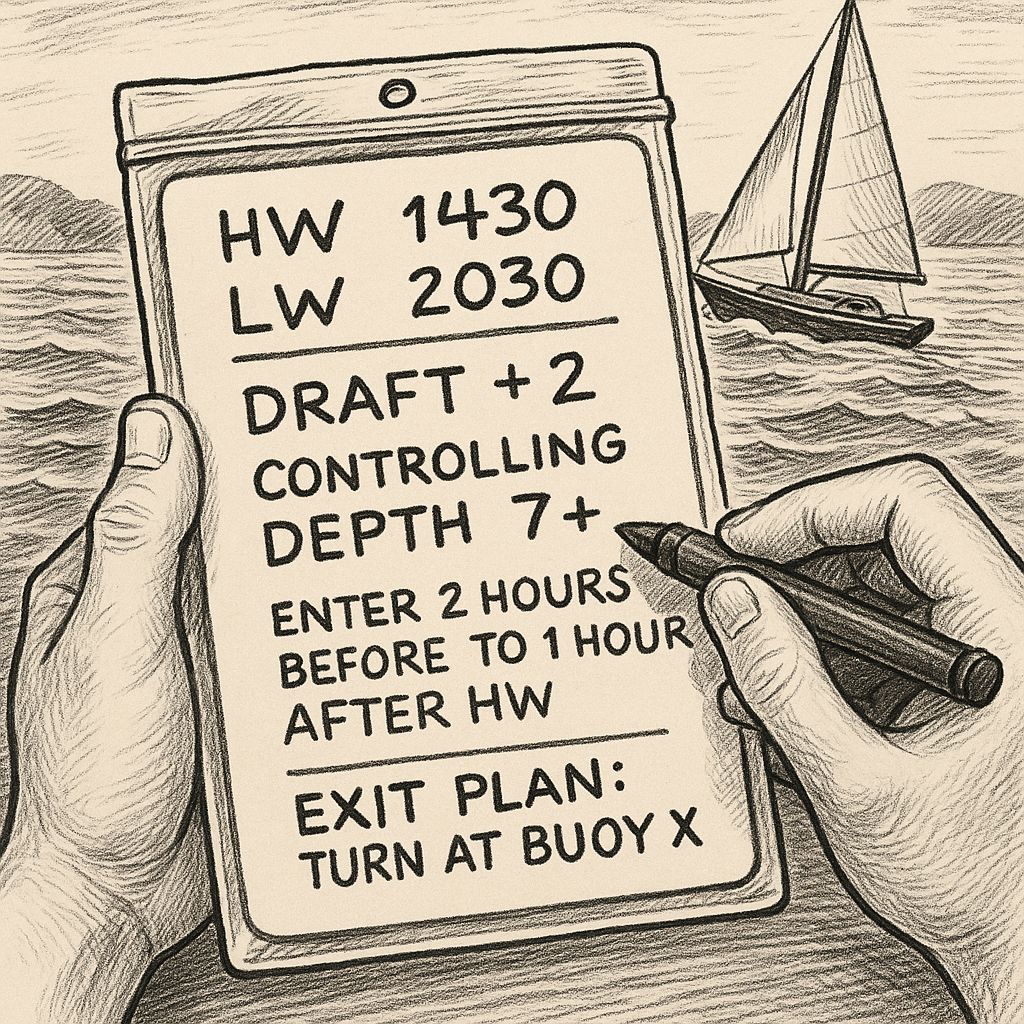
I write the key information on a small whiteboard or laminated sheet so I can refer to it easily as I approach. Here’s what goes on it:
- High and low tide times at the nearest tide station, adjusted for the inlet if local chart information provides a correction.
- The boat’s draft and the minimum depth I need beneath the keel for the conditions I expect.
- The shallowest point on the route into the inlet, including the depth over the bar or the shallowest charted sounding, and how much tide height I need to clear it.
- My go/no-go time window, based on the predicted tide and currents, the charted depths, and the conditions on the day.
Keep the information simple and easy to read as you approach the inlet. Use large, clearly written figures rather than small notes or detailed calculations. I also write down an exit plan: where I can turn around and which route I will take back out if the depth, current, visibility, or other conditions are worse than expected. Tide predictions and charted depths cannot account for every condition on the day, so I use the plan as a guide and reassess conditions as I approach.
I'll add some notes here from doing this in the real world: First, tide predictions may not reflect every local condition. Inlets near river mouths can behave differently from the reference station, and wind or river flow can change the actual water level. Second, don’t confuse “tide height” with “current.” You can have enough depth and still get shoved sideways.
Check Cross-Current Before Entering a Narrow Channel
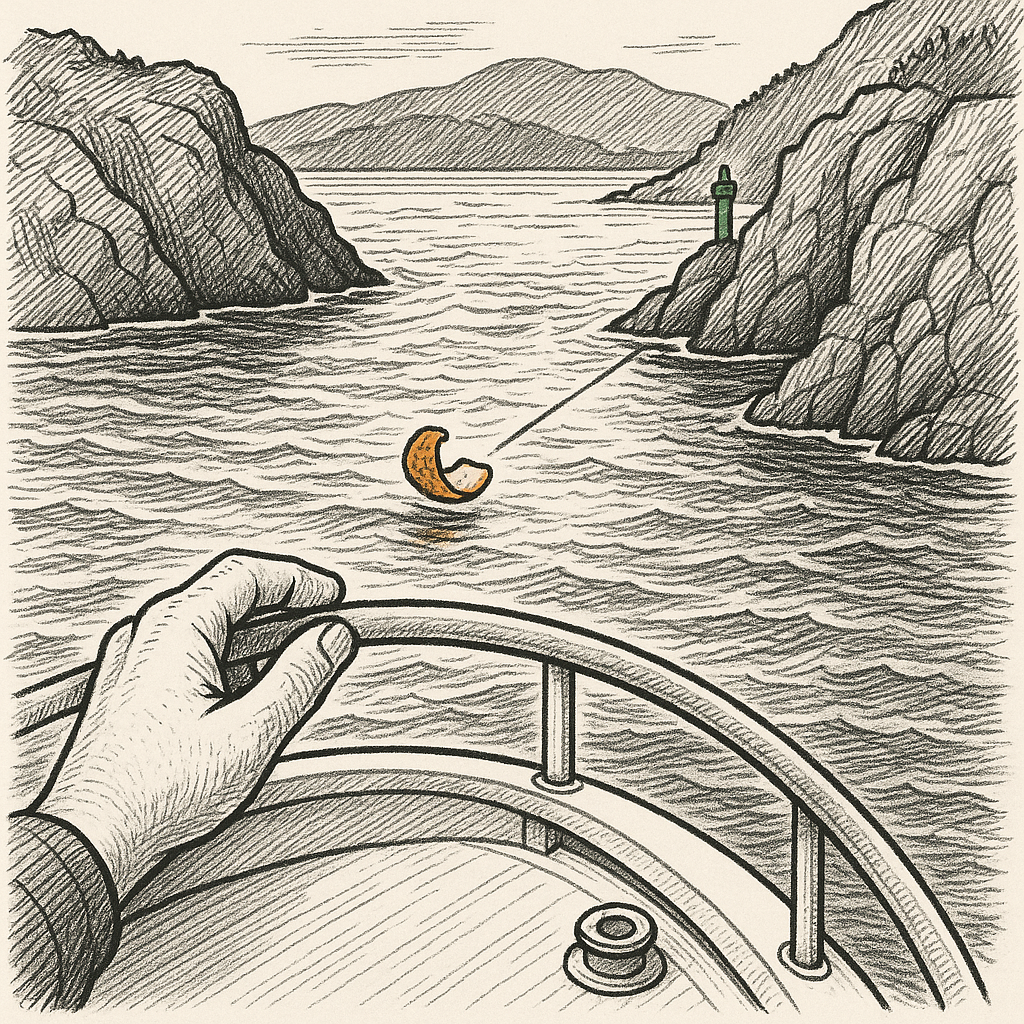
A calm-looking inlet can still have strong cross-currents or rougher water near the entrance. These conditions may not be obvious from offshore, particularly where rocks, headlands, or shoals shelter part of the entrance. Before entering a narrow channel between rocks or shoals, I may use a small floating marker to get a quick visual sense of the direction and strength of the surface drift. I watch how the marker moves relative to a fixed point, such as a buoy or shoreline feature. I use this only as a quick visual check and compare it with the charted and predicted current information, rather than treating the marker as a precise measurement.
Outside the entrance, I recommend slowing down in an area with enough room to maneuver and briefly putting the engine in neutral. Release the marker on the leeward side, where the wind is less likely to push it back toward the boat. Then observe two things:
- Angle of drift: Is it sliding straight in, straight out, or sideways across the line I want to steer?
- Speed of drift: Does the marker move slowly, or is the current strong enough to move it quickly?
If the marker is drifting sideways across the entrance, the boat will also be pushed sideways by the current. The helm may need to point the boat slightly into the current rather than directly toward the channel. A clear reference point on the up-current side of the entrance can make this easier: aim toward that point and let the current carry the boat toward the intended track.
The sideways push can also intensify at a constriction, where the flow may speed up and push the boat farther off its intended course. If the marker accelerates as it approaches the narrow entrance, the current may be stronger there than expected. In that situation, wait for a weaker current if conditions allow, or postpone the approach until there is more daylight and better room to maneuver.
GPS can also help show how the current is affecting the boat by comparing the direction the boat is pointing with the direction it is actually moving. I still use that information, but a floating marker gives me a quick visual check. It lets everyone on board see which way the water is moving instead of having to interpret numbers on a screen.
Plan Your Anchorage for Changing Tides and Wind
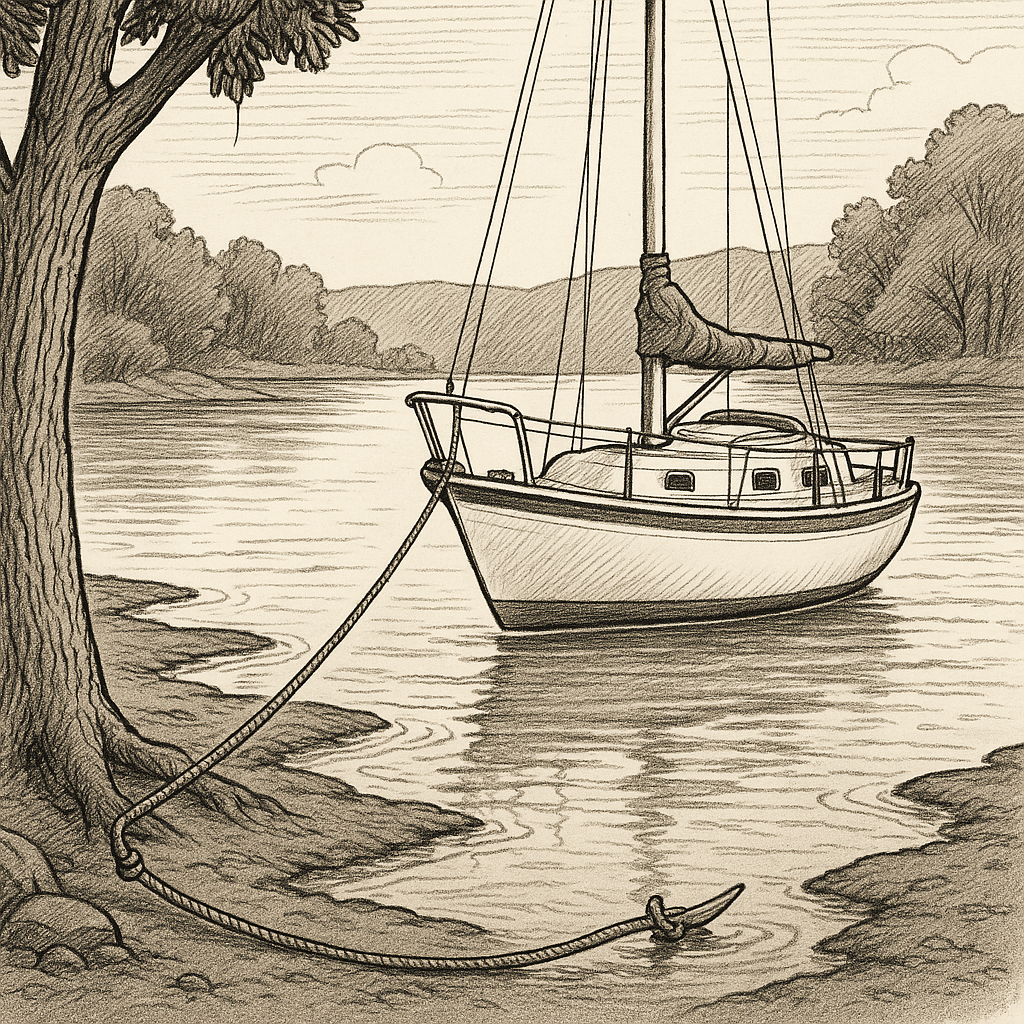
In places where the seabed shallows quickly and the water level changes significantly with the tide, I plan for the boat's position and available depth to shift overnight. Before anchoring, I also check for local restrictions and, where possible, avoid sensitive habitats such as seagrass beds. If the anchorage allows it, a second anchor or a properly secured shoreline can sometimes limit the boat’s swing. The setup needs to account for the expected tidal range, wind and current changes, depth, and enough room for the boat to move safely.
A few specifics that matter in practice:
- Chafe gear: Anything that touches a rock edge or a dock corner gets chafe protection. You can use purpose-made chafe protection or another durable material suitable for the load and contact point.
- Stern line leads: Run the line outside the lifelines and avoid sharp turns around stanchions or other fittings. Check that it has a smooth lead and is protected from chafing, especially if the boat will move against the line with the tide.
- Slack for tide: Leave enough slack in the stern line for the water level to fall and rise. A line that is too tight can put excessive strain on the boat or interfere with the main anchor.
I also check the depth behind the boat with the depth sounder and assess how quickly the seabed rises toward shore. A gently sloping, soft-mud bottom may offer greater tolerance if the water level falls, but the boat should still have sufficient depth to remain safely afloat. A steep or hard bottom requires a greater distance from shore.